Baking: Purple Plum Pie

Purple Plum Pie-01

Happy Monday, everybody! Today we’re talkin’ about pie. Purple Plum Pie to be exact.

Over the weekend, Benjy meant to order 3 plums from our trusty grocery delivery service, but instead of 3 individual plums, he got 3 packages of 5 plums each. So, faced with a plum surplus, I made them into a pie. A little bit tangy/a little bit rock n’ roll (or something like that?)

Ingredients: (crust)

Recipe is Paula Deen’s Perfect Pie Crust (because why mess with perfection?)

  • 2 1/2 cups All-Purpose Flour
  • 1/4 teaspoon Fine Salt
  • 3 tablespoons Granulated White Sugar
  • 1/4 cup (cold) Vegetable Shortening
  • 12 tablespoons butter (cold + cubed)
  • 1/4-1/2 cup Ice Water

Ingredients: (filling)

*Recipe adapted from this one.

  • 3 tablespoons + 1 cup sugar
  • 1 3/4 teaspoons ground cinnamon, divided
  • 2 tablespoons cornstarch
  • 2 teaspoons (packed) finely grated orange peel (I used a clementine)
  • 1/2 teaspoon ground nutmeg
  • 1/4 teaspoon salt
  • 1/2 vanilla bean, split lengthwise
  • About 10 purple plums, pitted, and thinly sliced

Directions: (crust)

  1. In a large mixing bowl (or a large food processor), sift together flour, salt, and sugar
  2. Add the shortening + break apart with your hands (I prefer to use a food processor)
  3. Add cold butter cubes + work quickly into the flour mixture (The butter cubes should be about 1/2″ wide on all sides, and should be frozen before being introduced into the flour mixture) Continue to work the butter into the flour until the mixture is crumbly.
  4. Add the ice water a little at a time until the dough forms. You want to add as little water as possible, so be sure to pour it in slowly.
  5. Bring the dough together into a ball
  6. Divide the dough in half + mold halves into discs
  7. Wrap each disc in tinfoil + refrigerate for at least 30 minutes

Directions: (filling)

  1. Preheat oven to 375 degrees
  2. Roll first dough half and transfer to pie dish
  3. Mix 3 tablespoons sugar and 1/4 teaspoon cinnamon in a small bowl; set aside.
  4. Whisk 1 cup sugar, 1 1/2 teaspoons cinnamon, and next 6 ingredients in large bowl. Scrape in seeds from vanilla bean. Add plums and toss to coat.
  5. Spoon filling into crust, mounding slightly in center.
  6. Roll out second dough half and cover bottom crust/filling in whichever way you usually finish your pies (I went with a lattice crust).
  7. Bake pie at 375 degrees for 30 minutes
  8. Loosely tent pie with tin foil to prevent over-browning, bake for another hour or so, until filling bubbles through latticework.


IMG_0015

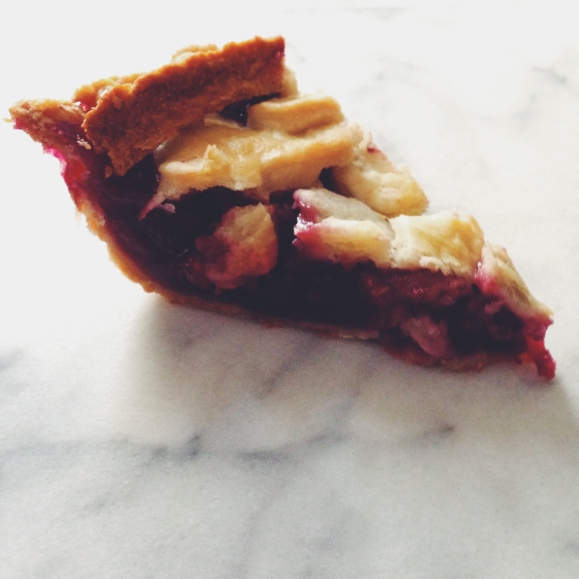
And voila! A perfect purple plum pie.


Tagged , ,

Spotlight: Simona Ciraolo

Prairie in Morocco Prairie in Morocco Prairie in Morocco Prairie in Morocco Prairie in Morocco

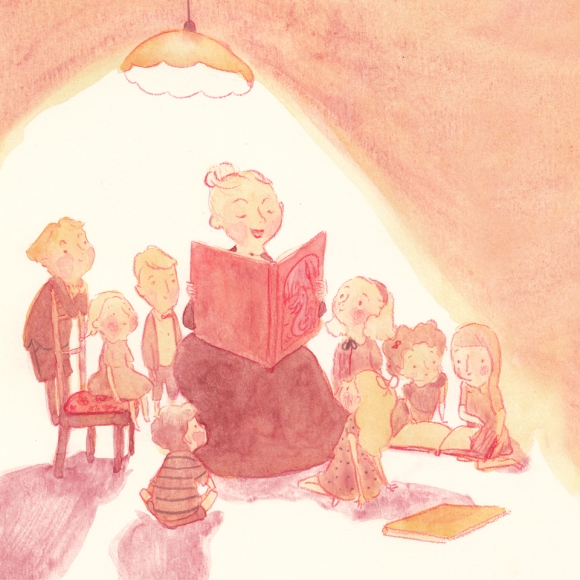
Today, we’re talking about Simona Ciraolo, an illustrator and children’s book author.

Simona’s illustration (seen above) of a little girl with a pink top knot and a tiger best friend to read books with is just… everything. It’s just like, how did she KNOW? There’s even an inquisitive lemur for good measure. I’d like to move in, please and thanks.

For more of Simona’s work, visit her website: http://simonaciraolo.com/


Tagged , , , , ,

REVAMP! #watchthisspace

Food and Art-01

Ladies and Gents, it’s time to get down to business.

This blog has been a pet project of mine for a while now. It’s been a beauty blog, a fashion blog, a design blog, and everything inbetween. Like a pre-teen trying to find its way into a clique. So awkward. Anywhoo, the search is over, folks. This blog will henceforth alternate between food and design (my two favorite things!)

Mondays, Wednesdays, and Fridays, I’ll be sharing my favorite recipes and current kitchen escapades.

Tuesdays, Thursdays, and Saturdays, I’ll be featuring artists and designers that have caught my eye. Basically, if you’re an artist and your work makes me jealous, I’ll be talking about you. If you’d like to submit your work for consideration, give a shout.

So that’s the rundown, everybody. This is going to be great…I feel it in my bones!

Cheers!

Kelsie


ps: the image on the right is by Jacob Sutton. His photos are dreamy! #swoon

Check out his work here.

Tagged , ,

Baking: Four Berry Pie

Processed with VSCOcam with f2 preset

(Backstory: Peach pie is my favorite. I’m an exceptional peach pie baker (if I do say so myself), and an even better peach pie eater.)

SO, the other day I was at the farmer’s market lamenting the lack of peaches, when I saw some really lovely crates of berries. I bought them, found a recipe, whipped up this Four Berry Pie, and EVERYTHING CHANGED. Peach pie shmeach pie. I’m in love. 4Berry 4Ever.
Notes: The crust is an all-butter crust, meaning it uses no vegetable shortening. I used a recipe from Gesine Bullock-Prado’s book Pie it Forward.

Filling Ingredients

1 cup sugar
1/4 cup cornstarch
1/2 teaspoon ground cinnamon
Dash of salt
1/3 cup water
1 cup fresh blueberries
1 cup halved fresh strawberries
1 cup fresh raspberries
3/4 cup fresh blackberries
1 tablespoon lemon juice
2 tablespoons butter
 

Crust Ingredients

2 cups all-purpose flour, cold
1 teaspoon salt
1 tablespoon sugar
1 cup unsalted butter, cut into small pieces and chilled in the freezer for 10 minutes
1/2 cup ice water (don’t add the ice to the pie dough, just the water)
1 teaspoon lemon juice
 

Crust Instructions:

  1. In the bowl of a food processor fitted with the blade attachment, pulse together the flour, salt, sugar, and butter until the mixture resembles cornmeal.
  2. In a small bowl, stir together the ice water and the lemon juice. Slowly add the liquid to the flour mixture, pulsing, until the dough just comes together. Squeeze a small piece of dough between your thumb and index finger to make sure it holds its shape.
  3. Turn the dough out onto a lightly floured surface and divide it in half. Gently turn over each piece of dough a few times so that any dry bits are incorporated. Form each piece into a loose disk, cover the dough with plastic wrap, and let it rest in the refrigerator for at least 20 minutes.

While the dough is chilling in the refrigerator, get started on your filling.

Filling Instructions

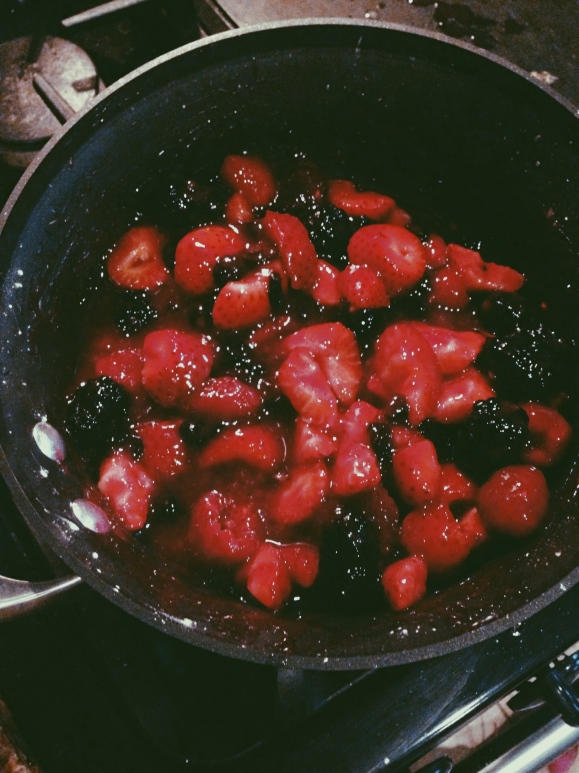
  1. In a large saucepan, combine the sugar, cornstarch, cinnamon if desired, salt and water until smooth; add the blueberries. Bring to a boil; cook and stir for 2 minutes or until thickened. Set aside to cool slightly.

Processed with VSCOcam with g3 preset

Processed with VSCOcam with f2 preset

2. Gently fold the strawberries, raspberries, blackberries and lemon juice into the blueberry mixture.

Processed with VSCOcam with p5 preset

3. Preheat your oven to 400 degrees.

4. Take your dough out of the refrigerator and roll it out onto a floured surface. Line the pie pan with the first half of the rolled dough, and blind bake for 15 minutes (*blind baking is optional). If not blind-baking, flour the dough lightly, and then pour the berry mixture into the crust-lined pan.

5. Cover your pie with your top crust, and vent the crust however you prefer (classic vents, lattice crust, etc.). Using a pastry brush, brush an egg wash over the top crust (1 egg whisked with 2 tablespoons of water).

6. Bake at 400 degrees for 10 minutes. Reduce heat to 350 degrees and back for 45 minutes or until the crust is golden brown and the filling is bubbly.

And that’s all she wrote, folks! A truly fantastic Four Berry Pie!

Tagged , , , , , , , , , ,

Spotlight: Berta Salinas

tumblr_mw0d6ftO641t0kbu3o2_1280

tumblr_mw0dogP0f61t0kbu3o1_1280

tumblr_mwqawfBhY11t0kbu3o1_1280

tumblr_mwqat9nlb41t0kbu3o1_1280

tumblr_mwqasrRm791t0kbu3o1_1280

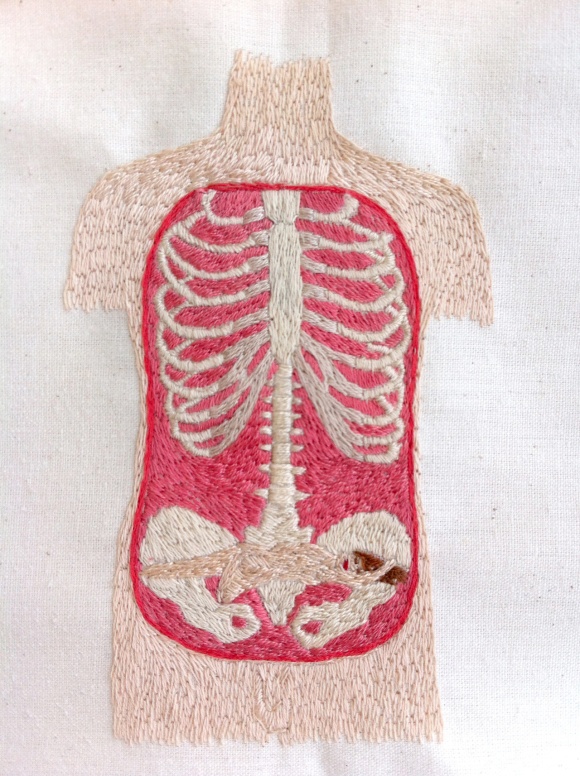
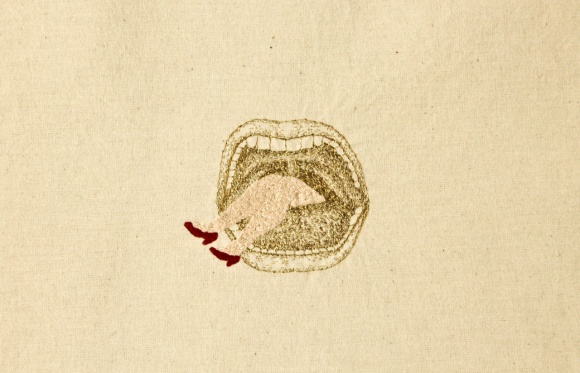
Before I came across Berta Salinas’ work, I would’ve described embroidery as “kitschy” or “retirement home-y.” Clearly, I was wrong! I mean, the subject of the series of embroideries above is cannibalism. Cannibalism. She’s superseded kitsch, and I love it.

Also, Berta Salinas is a badass artist from Madrid. You can see more of her work here. She sells her embroideries here.

Tagged , , , , ,

Spotlight: Eric Marinovich + DoNotOpen.IT

x01.jpg.pagespeed.ic.MVL7vh90-d x01.jpg.pagespeed.ic.5xEXsF4zir x01.jpg.pagespeed.ic.bVweMsDNHv x01.jpg.pagespeed.ic.DcWb3sC_FK x01.jpg.pagespeed.ic.ZGYHf_7vdVEric Marinovich, a San Francisco-based typographer, is the bee’s knees when it comes to lettering. Recently, Marinovich started DoNotOpen.IT. For $175, Marinovich will make you your very own hand-lettered mailing envelope with your name and address and send it to you (in an outer envelope, so that the piece remains clean).

I mean really, the medium, the craft, the price?! Worth every penny. Sign me up.

Tagged , , , , , , , , ,

Spotlight: Oliver Jeffers

adolf-dali-oj-web   Screen Shot 2014-01-07 at 5.41.52 PM

Screen Shot 2014-01-07 at 5.41.46 PM

Screen Shot 2014-01-07 at 5.41.58 PMOliver Jeffers, a Brooklyn-based artist, made these paintings (the series is called: “Dictators and Hair”). I think he had a fun time painting them, you know? And subsequently I’m having a fun time viewing them! Win/win.

Tagged , , , , ,

Think About It: Fresh Ink

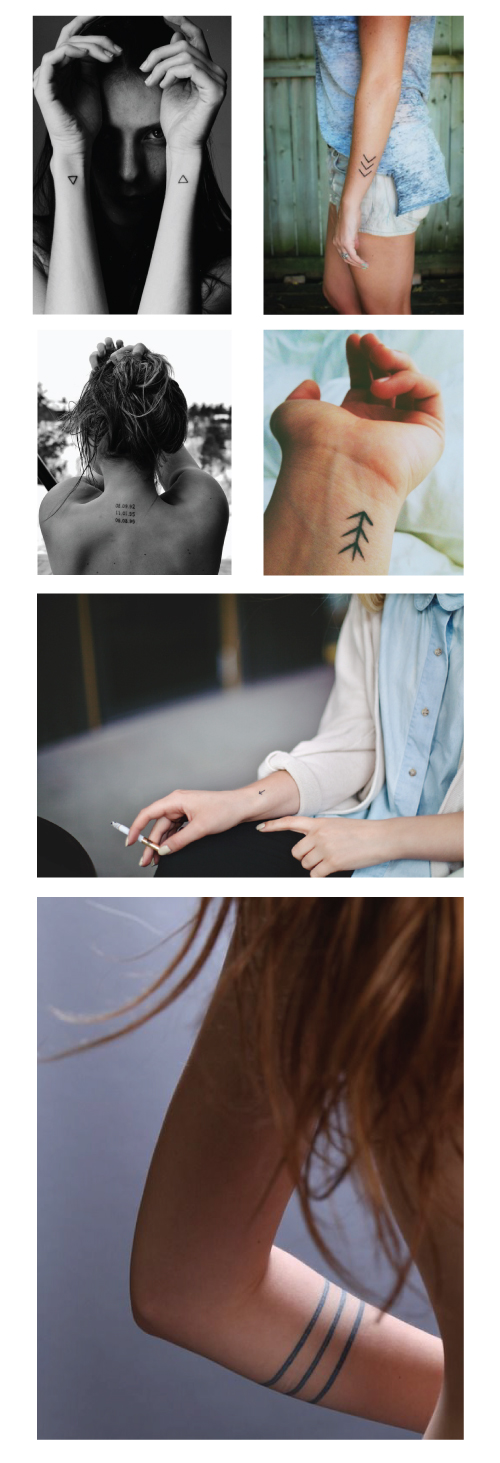
InkI love subtle tattoos. The ones that you don’t notice at first glance. They’re private, and a little bit surprising.

When Benjy and I got married a couple of months ago, we decided to get matching tattoos similar to the lines in the bottom image above. The first ring we’ll get for one another, to signify our marriage. For each of our children we’ll add another band, like the rings of a tree.

Do you have any tattoos? Any tattoos you’d like to get? Share your stories in the comments section!

 
1, 2, 3, 4 + 5, 6
Tagged , , , , ,

Baking: Strawberry Raspberry Hand Pies

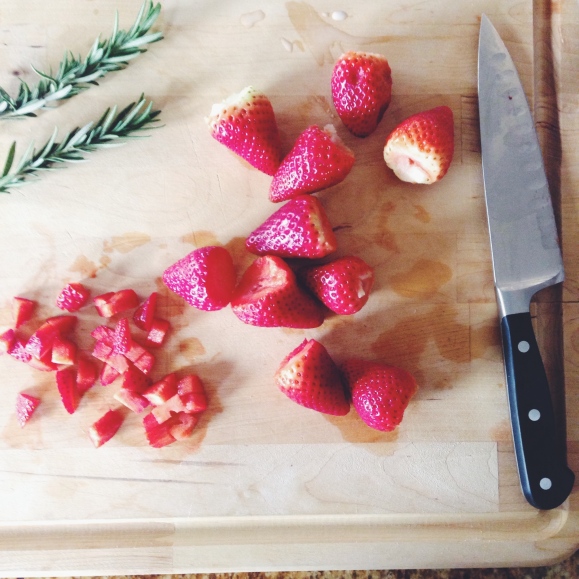
As you all know, I’m a bit of a pie fanatic. I love the baking just as much as the eating, and am always on the hunt for new and exciting recipes. So, when my best friend/Maid of Honor/all-around cool chick Darcy gave me Gesine Bullock-Prado’s pie cookbook Pie it Forward as a wedding gift, I began cooking (and eating) my way through. These Strawberry Raspberry Hand Pies are my favorite so far, and I couldn’t help but share the recipe with all of you.

Ingredients:
Filling:
  • 1/2 pint Fresh Strawberries
  • 1/4 cup Granulated Sugar
  • Zest and Juice of 1 Lemon
  • Fresh Rosemary, finely chopped
  • 1 teaspoon Cornstarch
  • A Pinch of Sea Salt
  • 1 cup Fresh Raspberries (halved)
  • Egg Wash (1 egg whisked with 2 tablespoons of water)
  • Sanding/Turbinado Sugar, for sprinkling
  • 1/2 cup Confectioner’s Sugar
  • 2 tablespoons Milk
Crust:
  • 2 cups All-Purpose Flour (cold)
  • 1 teaspoon Baking Powder
  • 1/2 teaspoon Salt
  • 3 tablespoons Vegetable Shortening (frozen)
  • 2 tablespoons Unsalted Butter (cut into small pieces and chilled)
  • 1/2 cup Milk
  • 1/4 cup Sweetened Condensed Milk

Filling:

  1. Hull the strawberries. Cut them into small pieces, a bit larger than corn kernels. Combine the strawberries, sugar, lemon zest, and rosemary in a mixing bowl and stir until the strawberries are evenly coated with sugar. Allow the mixture to rest for a few minutes until the sugar melts and the strawberry juices run freely.
  2. Drain the strawberry juice into a small bowl. Add the lemon juice, then stir in the cornstarch until the mixture becomes a smooth slurry without lumps.
  3. In a heavy-bottomed saucepan, combine the strawberries, the cornstarch slurry, and the salt. Stir over medium heat until the mixture bubbles and thickens, 5-10 minutes. Allow the filling to cool completely in the refrigerator (about 20 minutes).
  4. Stir the raspberries into the strawberry mixture.
  5. Preheat the oven to 350 degrees.

Dough:

  1. In a food processor, pulse together the flour, baking powder, and salt.
  2. Add the shortening and butter. Pulse until the mixture resembles cornmeal.
  3. Whisk together the milk and condensed milk.
  4. With the processor running, slowly add the milk mixture and continue to pulse until the dough just comes together.
  5. Turn the dough out onto a large piece of plastic wrap. Use the plastic wrap to turn the dough over a few times, until it no longer has dry bits of flour visible and is smooth. It’s important that the dough be rather smooth; otherwise, when you roll it out for your crust, the dough will crack.
  6. Wrap the dough in the plastic wrap and let it rest in the refrigerator for at least 20 minutes before using.

  1. Divide the dough evenly into 12 pieces, and roll out using a cold rolling pin. Using a round cookie cutter, cut each piece into a 4-inch round and place the rounds on a parchment-lined sheet pan.
  2. With a pastry brush, brush egg wash around the outer edge of the dough rounds. Place 1 1/2 tablespoons of filling onto the middle of each round. Fold the dough over, creating a half moon, and seal the pastries by pressing gently along the edge of each with the tines of a fork. Brush the outsides of the pastries with egg wash and sprinkle with sanding/turbinado sugar (*note: I used Sugar in the Raw and it worked nicely).
  3. Bake for 20 minutes or until golden brown. Allow the hand pies to cool completely.
  4. Whisk together the confectioner’s sugar and milk. With a clean pastry brush, brush each hand pie evenly with the glaze.

And voila! Perfect little hand pies for any occasion.

Tagged , , , , , , , , ,

Lessons Learned from My Wedding

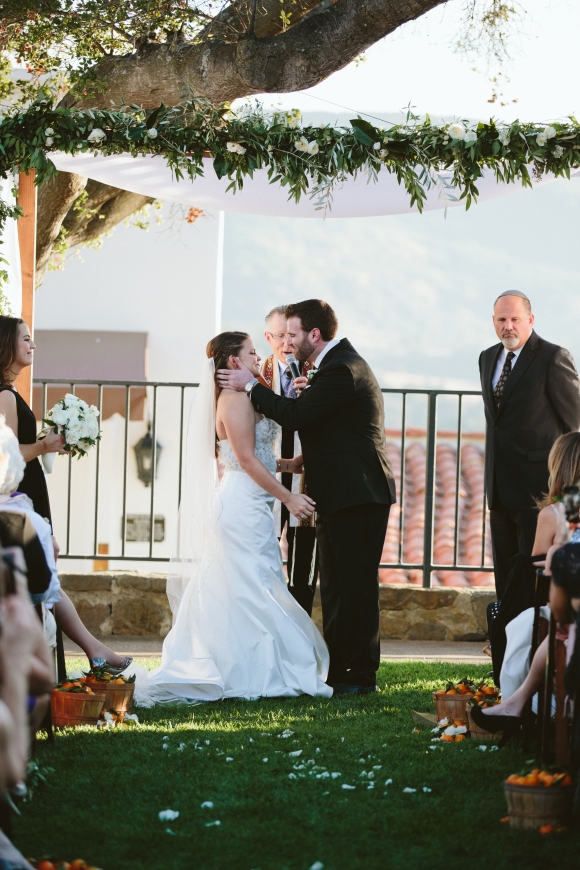
On our wedding day, our wedding planner (the goddess Paige of Bash, Please) told a very anxious about-to-walk-down-the-aisle me to “just do what feels natural.” She told me to go with the flow, to be myself, and most importantly, to relax. So when my heels started sinking into the grass, I ditched my shoes. And by “ditched my shoes” I mean I literally took them off just before I was going to say my vows. In front of everyone. Because it felt like the right thing to do. I knew that if I didn’t take them off I’d be focused on my shoes and not on my vows. And you know what? It was totally fine. It got a few chuckles from the front row, and I read my vows with sincerity and focus.

Kelsie + Benjy-3 2Kelsie + Benjy-15 2

Focus on the big things first. When we got engaged, we dove right into the planning process. As much as I wanted to focus on the details (like the papergoods, decor, etc.) I knew I’d be better off going from macro first to micro later. Almost immediately we booked our wedding planners (Bash, Please), our venue (The Ojai Valley Inn), and bought the dress (from Monique Lhullier). Once the big things were done, I was able to focus on the smaller things, and even more importantly, I was able to envision how each detail would fit into the larger picture.

Kelsie + Benjy-89 Kelsie + Benjy-138 Kelsie + Benjy-152 Kelsie + Benjy-251

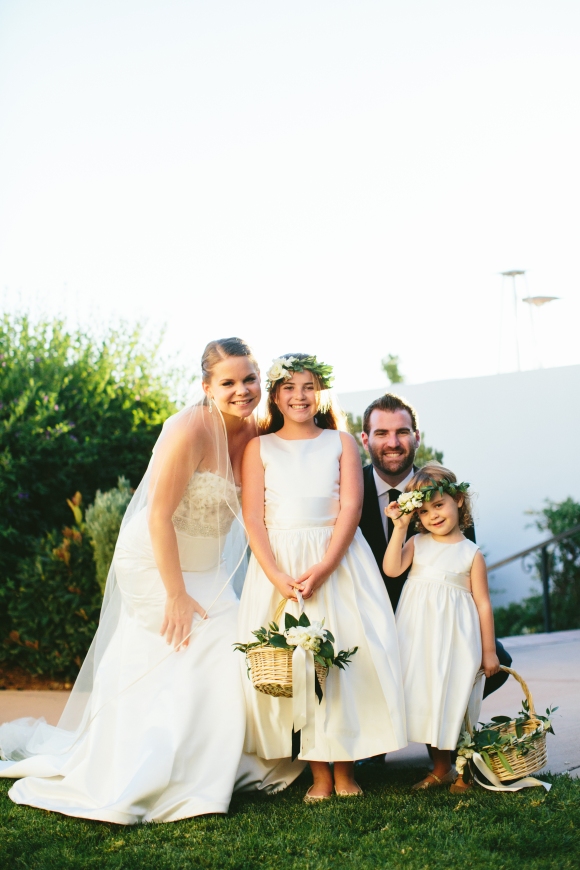
Our wedding party was a collection of our oldest, nearest, and dearest friends. I chose my bridesmaids based on who I thought would be in my life forever. I took it very seriously, and felt honored and blessed to have such wonderful people standing up there with us as we said our vows.

Kelsie + Benjy-282 Kelsie + Benjy-527 Kelsie + Benjy-399 Kelsie + Benjy-407

Don’t sweat the small stuff. Things will go wrong. I took off my shoes, my bustle ripped on the dance floor, the band mixed up the mother/son & father/daughter dance songs. But those moments add character. The mix-ups remind us that this is real life, this is happening. Don’t sweat it, because at a wedding full of love and happiness, nobody really notices the bumpy bits anyway.

Kelsie + Benjy-499 Kelsie + Benjy-422 Kelsie + Benjy-523Kelsie + Benjy-563Kelsie + Benjy-520Kelsie + Benjy-602Kelsie + Benjy-747 Kelsie + Benjy-744
Party like it’s 1999. My wedding was, without a doubt, the most fun night of my entire life. I felt so loved, so honored, so full-to-the-brim. I wouldn’t have had it any other way.

Photography: Paige Jones Dress: Monique Lhullier Venue: Ojai Valley Inn Wedding Planning: Bash, Please Florals: Twig + Twine Papergoods: Page Stationery

Tagged , , , , , , , , , ,